Frequently Asked Questions
I have no connectivity to the Radio
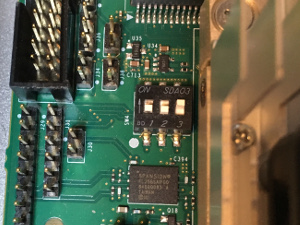
- Ensure that the FPGA DIP Switch (SW4) is set to
0, 0, 1as shown in the figure below.
- Ensure that you are able to see the Xilinx FPGA on the PCIe bus: should return:
$ lspci00:01.0 PCI bridge: NVIDIA Corporation Device 10e5 (rev a1) 01:00.0 Serial controller: Xilinx Corporation Device 7024
How do I enable WiFi / Bluetooth
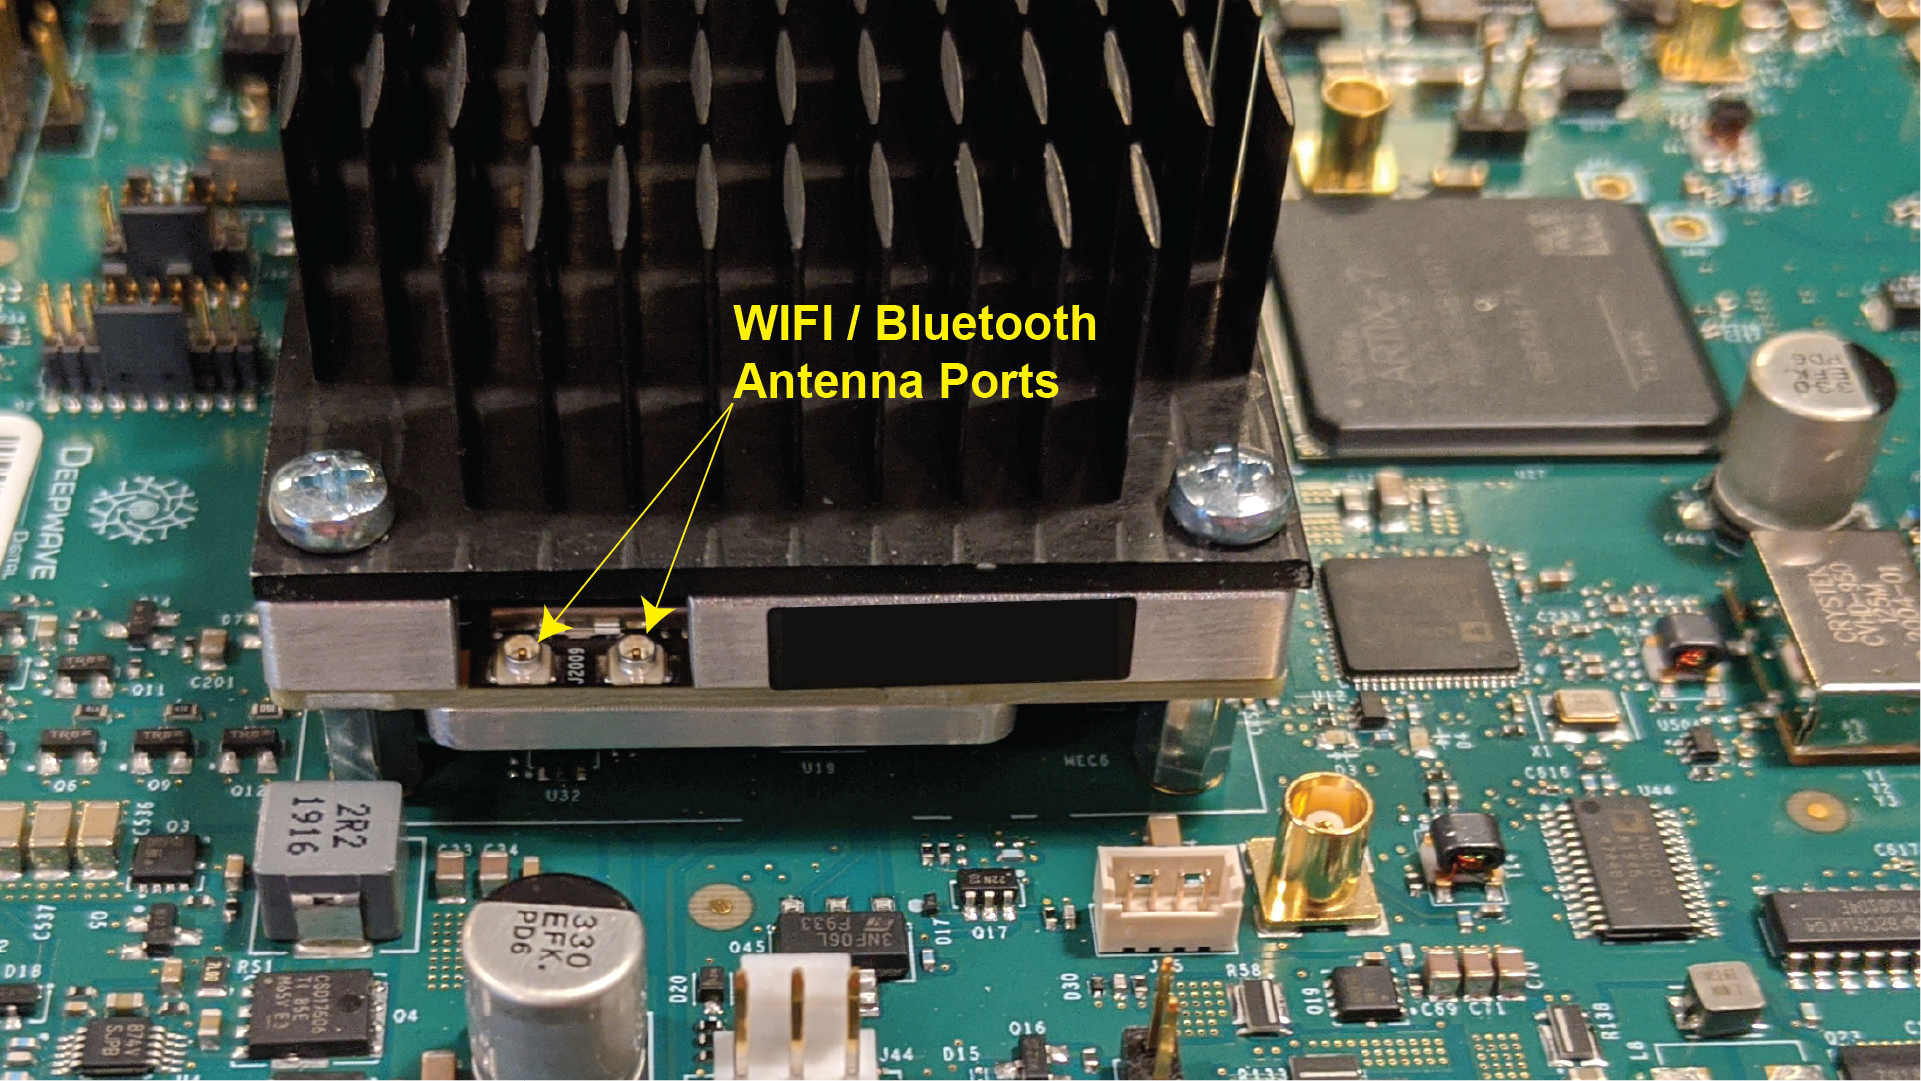
The AIR-T has WiFi and Bluetooth capability that is supported through the NVIDIA Jetson TX2 module. To use these features, you must purchase an after-market antenna and cables. Since the system is MIMO capable, two antennas are required.
Required Parts
- An AIR-T with enclosure
-
Antennas (x2): 2.4/5/8 GHz Dual Band, Pulse Electronics W1043, Purchase
-
Cables (x2): U.FL mini to RP-SMA, Linx Technologies CSJ-RGFB-200-MHF4, Purchase
Instructions
-
Open the AIR-T enclosure by removing the screws on the feet and sliding out the housing.
-
Connect the cables to the Jetson module as shown in the photo below.
-
Remove the nut and washer from the cable assemblies and route the cables to the WiFi / Bluetooth through holes on the back of the AIR-T enclosure. Place the washer on the RP-SMA connectors and tighten the nuts.
-
Connect the antennas to the RP-SMA connector on the enclosure.
-
Reassemble the enclosure and boot the AIR-T.
-
Enable WiFi and/or Bluetooth in the network manager settings.
I receive a SoapySSDPEndpoint error when starting the radio
For some versions of AirStack, you will receive the following "Error" which should actually be a warning:
[ERROR] SoapySSDPEndpoint::sendTo(udp://[ff02::c]:1900) = -1
  sendto(udp://[ff02::c]:1900) [99: Cannot assign requested address]
This is not an error. One of the Soapy plugins (to allow the AIR-T to be controlled over a network) needs to be configured for your network. This message does not affect the AIR-T functionality.
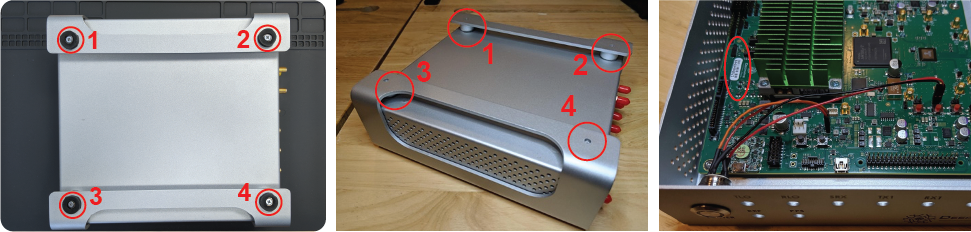
I need the serial number and it isn't printed on my enclosure
- Turn over the AIR-T and use the phillips head screwdriver to remove the 4 screws shown in the left figure below.
- Remove the aluminum spacers by sliding them out of the feet as shown in the middle figure below.
-
The serial number of the unit is printed on the white sticker, as shown in the right figure below.